This week marks week 1 of my year off! Self-funded leave, and my colleagues are all back at work (school) ! Lots of sewing, and some travel planned! First trip: camping on Vancouver Island, and that is coming up quick.
I "needed" a new pair of rain pants for this trip, so that was in the queue. But first I wanted to get the birthday gifts for my nieces (summer birthdays) done. And then, hopefully, I might have time for a pair of wool leggings for the trip. I got to the collar of the Atenas jacket, and will put that away in favour of the other projects.
SILK PILLOW CASES
 |
| Such pretty colours |
The silk I bought is a crepe-backed satin, meaning that one side is less slippy than the other side. I decided not to do a zipper closure, but rather a tucked-in evelope style, and copied a pillow case that I have in that style.
 |
| Flap to hold the pillow in |
 |
| Sweet Dreams |
Silk is wonderful to the touch! It just felt lovely and luxurious. It was not too bad to sew, either. I did French seams, of course, so overall I am very pleased with the results.
ATENAS JEANS JACKET PROGRESS
 |
| welt pocket |
The flat-felled seams reall did add a lot of bulk, and so there is a bit of a wrinkle where the fabric probably stretched just above the chest pockets. I think it will be fine, only really noticeable to me when I examine my work. So those pockets turned out okay. The pockets are optional, and one option is to make a false pocket (installing only the flaps). I can't really find examples of makes where they made the full pockets, but there is obviously more bulk... and I am not sure the flap is lined up as nicely as other people have done.
But I am super happy with the welt pockets. I was able to cut perfectly into the corner, which allows them to fold in with no puckers. The topstitching is also working out with few gltiches on the Juki. YAY!
I have prepared the collar, but want to give it my full attention, so that is on hold for now.
 |
| nearly done! |
RAIN PANTS
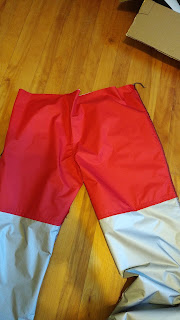
I had purchased some recd neoshell from Our Social Fabric, at a very good price (even with the shipping), and had considered making myself a cycling jacket, like the previous one. But my current rain pants are bulky, and no longer entirely waterproof, so I decided to use the Carolyn PJ pants to make rain pants.
I wanted the leg narrower, so did the pattern work, and had the good sense to make up a one-legged muslin. GOOD THING! They were WAY TOO NARROW. So... I did a much more subtle narrowing on the lower leg, and went ahead and cut into the neoshell.
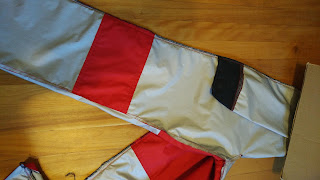
It is giving me a few more problems than it gave me on the cycing jacket.... not sure why. I have also decided that I do need so topstitching, and that I won't worry about the potential for leaks. (A quick test suggested that I am okay. I don't plan to submerge myself with these on!) I added reflective piping to the side seams, and am adding a tab with snaps at the bottom (to mimic the MEC River wind pant I am inspired by.) It isn't perfect, but it will do! I have added snaps and reflective tape to the bottom hem... these pants are ready for 'weather' !
 |
| reinforced bum |
 |
| reinforced knees |
 |
| reflective tape |
 |
| tab and snap |
 |
| elastic and drawcord waist |

Comments
Post a Comment
Feel free to leave a message. I am happy to hear from you. If you post anonymously feel free to leave your first name!