I had a bit too much other stuff to do this week, (preparing for report cards), so I did not want to start anything new after finishing the Brownie dress/tunic.
However, I have a longer term project on the go my crazy, amazing, technicolour dreamcoat. Always on the lookout for things to do with scraps of various sizes, I have had in my mind some kind of patchwork garment for a while. I finally have gotten started on it... in the organizing, anyway.
Last week I began working on scraps. I have a plan, dividing scraps into size; depending on how it can be cut the following way:
6 x 6 inch squares (for the dreamcoat)
5 x 5 inch squares (just because)
3 x 3 inch squares
2 X 2 inch sqares.
The smaller ones will just be sewn into biger and bigger 'squares (2x2,). I would like to make those into dust-covers for the machines (i.e. the serger, the Juki, and maybe the White). Also, bags. They will be pretty randomly assembled!
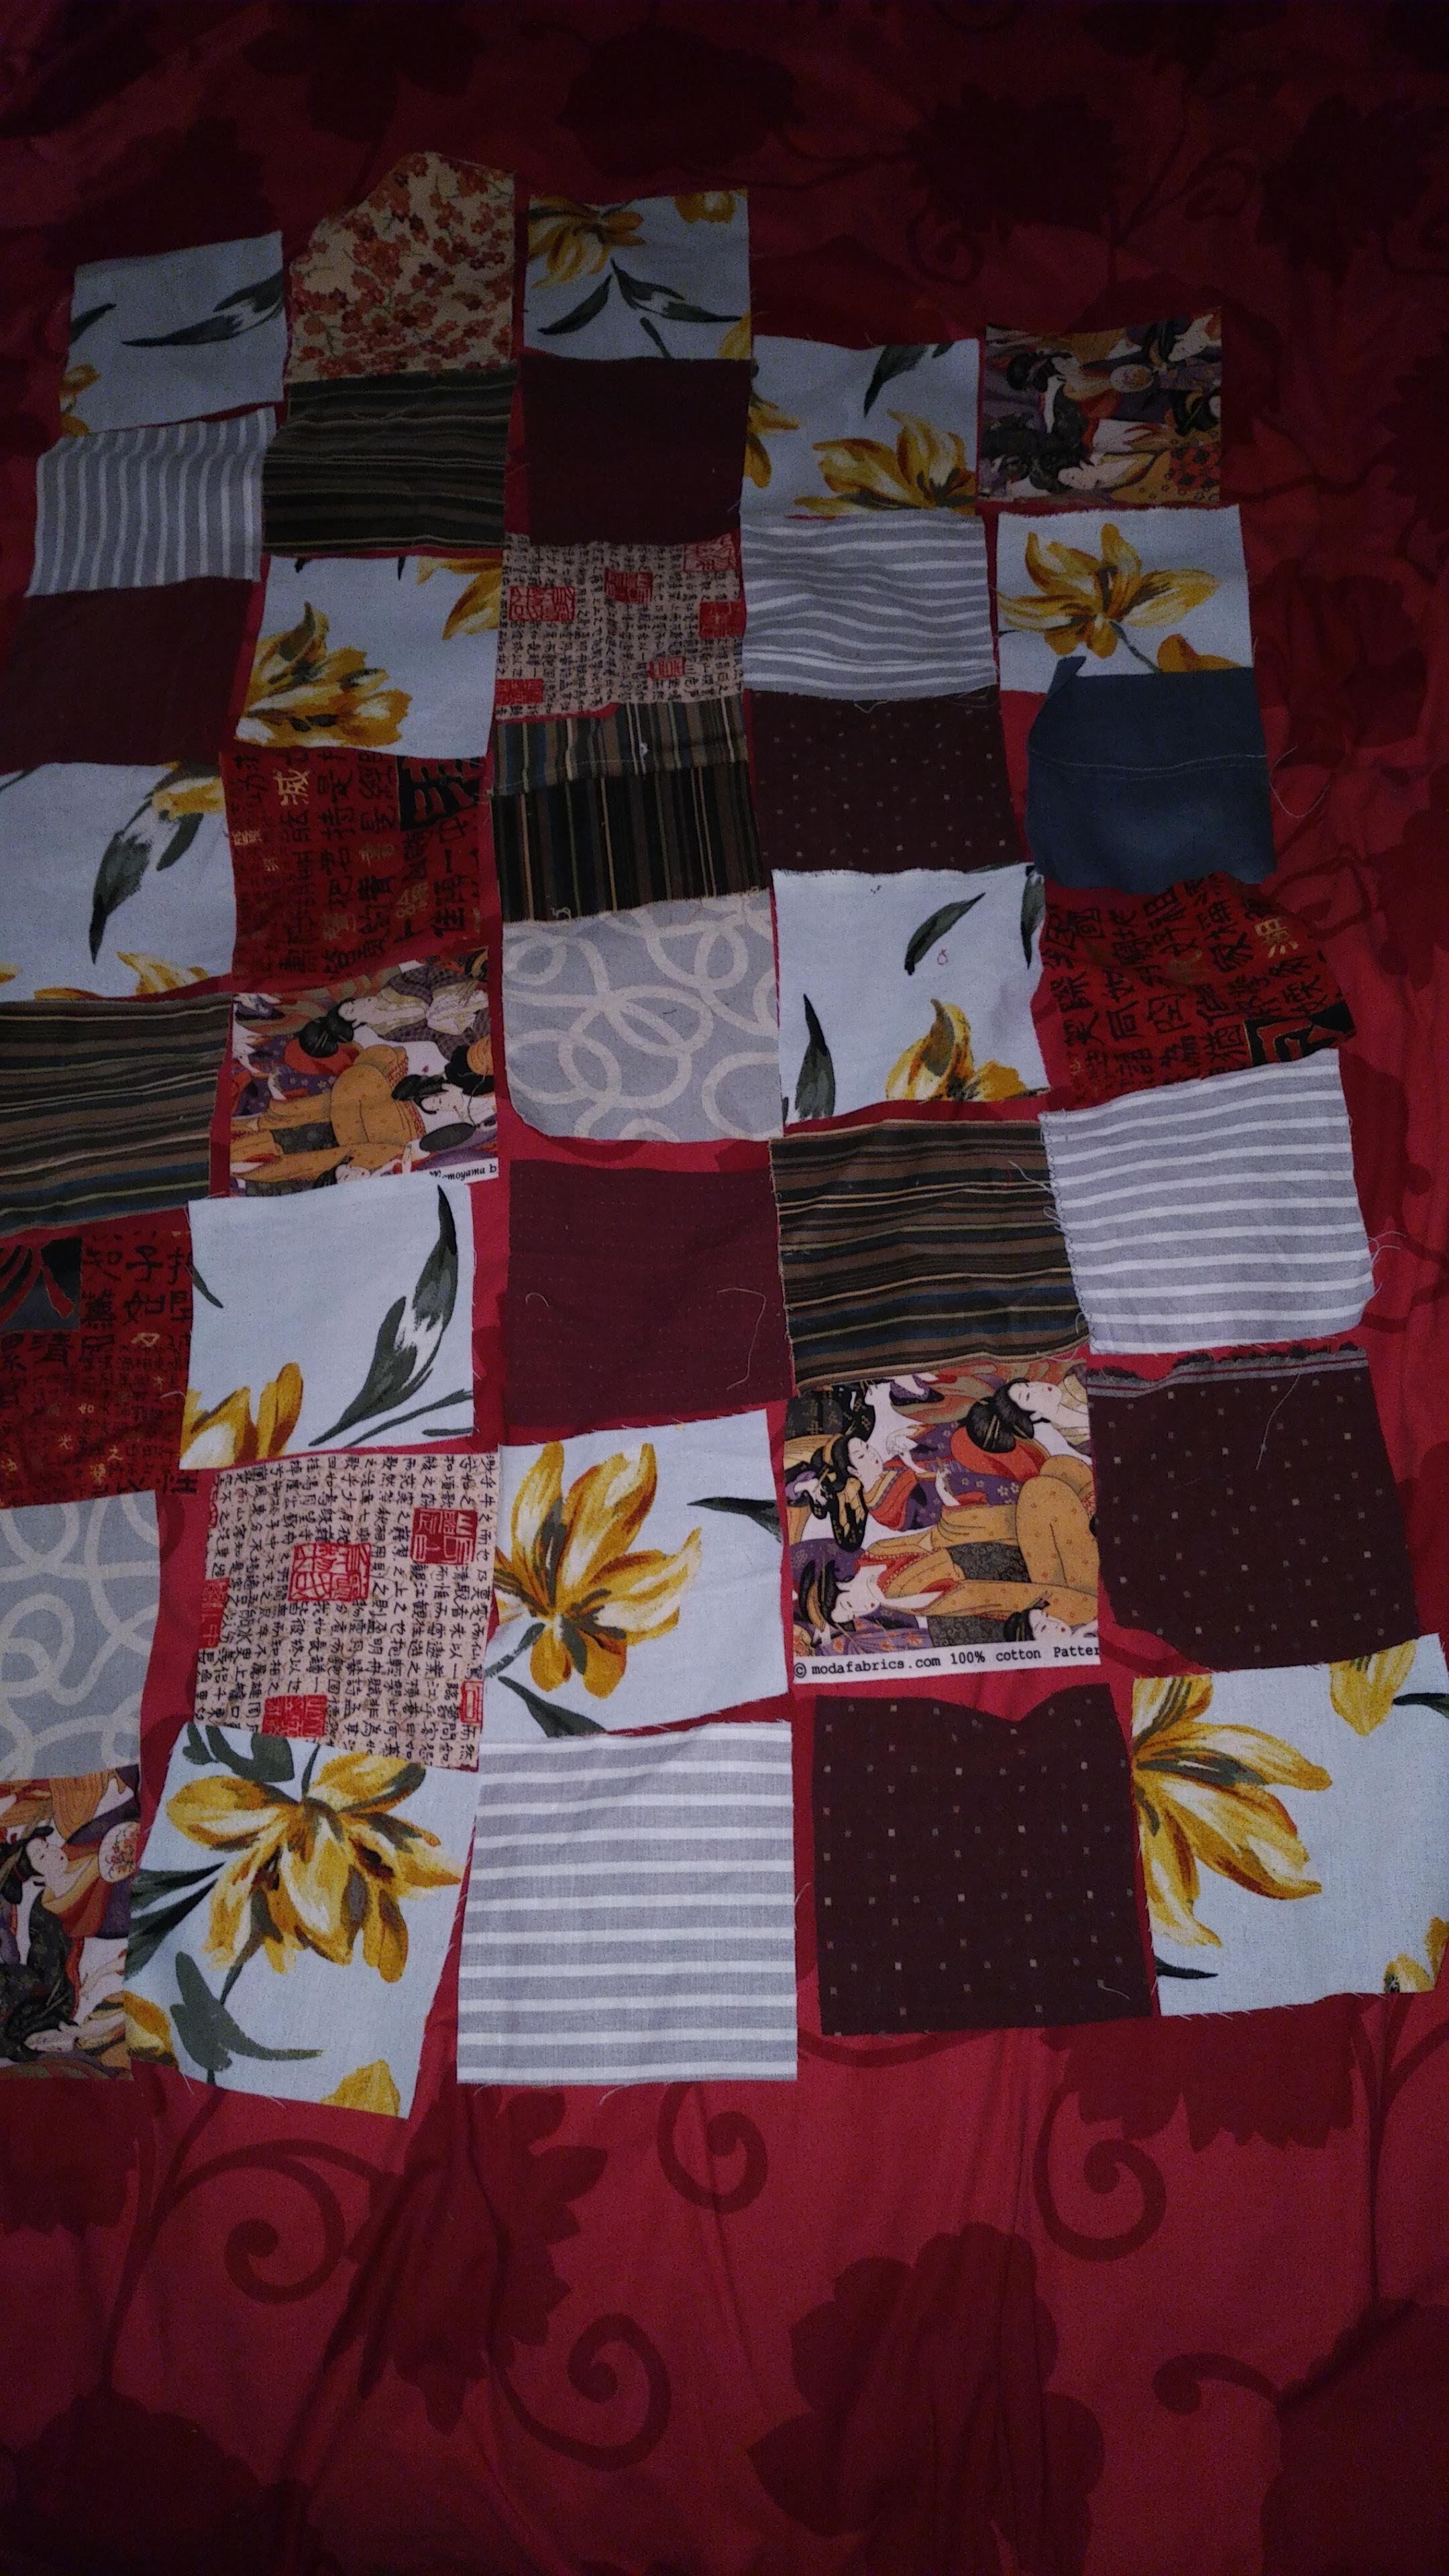 |
| just laying it all out to get a peek |
 |
| the pile, so far. |
I spent time cutting these various squares, and even sewed some of the 2 x 2 inch squares into 2 X 2 piece squares.
But I did get tired of sorting through the messy bag of scraps identifying the size. So I attacked the big messy bag of scraps. I laid a sheet on the bed to catch the threads, and dumped it all there to sort it out.
I put knits together in one bag, hoping to make some 'scrappy' undies soon.
I put slippy things in another, to use as lining bits, pocket facings, etc.
I put my larger pieces together to either use for the dreamcoat, or future similar projects
I put the smaller pieces together for my patchwork projects.
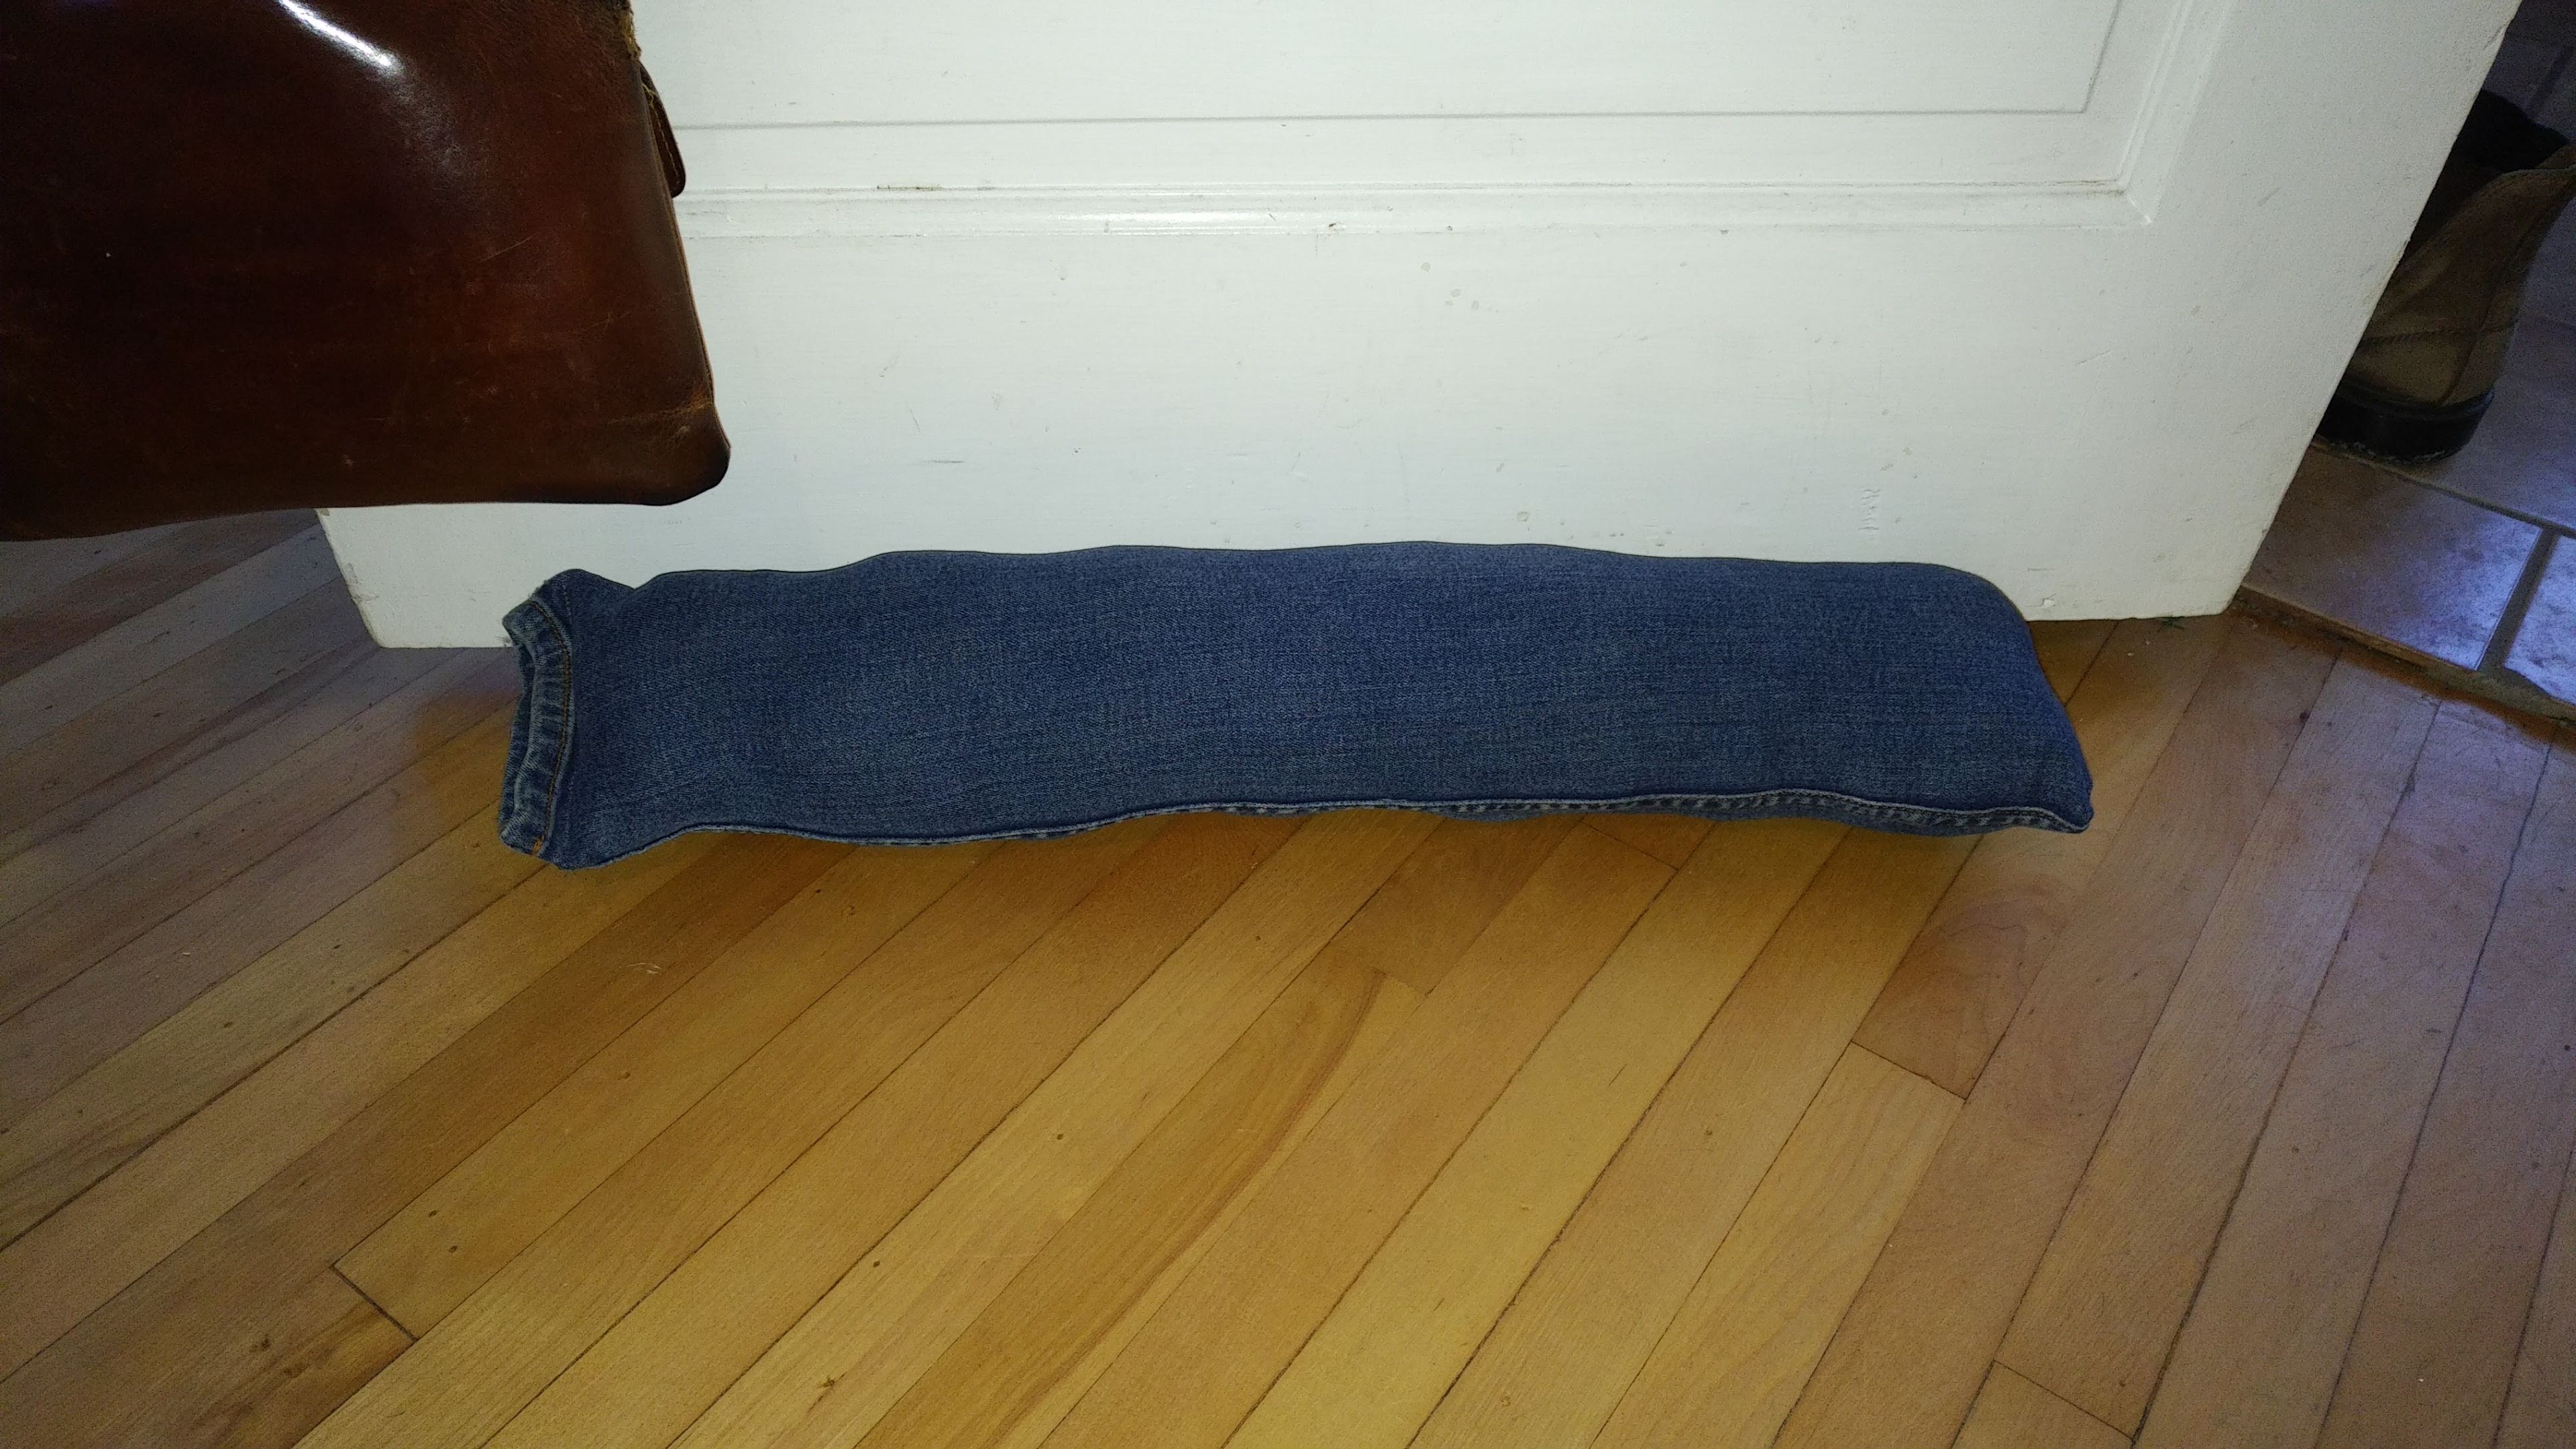
And... of course there were discards. As I gazed at the discards, worrying about sending stuff to the landfill, and knowing that there were projects in my future that would require stuffing, I recalled something I had read just recently on Pattern Review about door stoppers!
We have an inner door, separating our entry way and inner hallway that we have propped open with random objects of inadequate suitability for the past few years. I had originally knit a 'sausage' like shape and stuffed it with a rolled up towel when we needed to keep the door closed and the gap blocked; that item got quite worn and had to be repurposed. I was fed up with the door not staying put. Sure, we could remove the door (as we have done with all of our closet doors, in spite of the dust!), but then where would we hang things?

Comments
Post a Comment
Feel free to leave a message. I am happy to hear from you. If you post anonymously feel free to leave your first name!